Products
Solutions
Resources
9977 N 90th Street, Suite 250 Scottsdale, AZ 85258 | 1-800-637-7496
© 2024 InEight, Inc. All Rights Reserved | Privacy Statement | Terms of Service | Cookie Policy | Do not sell/share my information

Control uses three data blocks for forecasting:
Forecast – Enter and adjust forecast values.
Forecast delta – Compare two forecasts side by side.
Live forecast – displays the official project forecast.
All forecasting adjustments are made in the Forecast data block. This block includes a variety of columns that show cost, man-hours, and productivity, as well as forecast methods.
When you first access the Forecast data block, either by opening the Forecasts view or by adding the data block to your view, it will show several options for loading a forecast. Select New private forecast or New shared forecast to load a new forecast based off the Live forecast. You can also select an existing forecast under Recent.
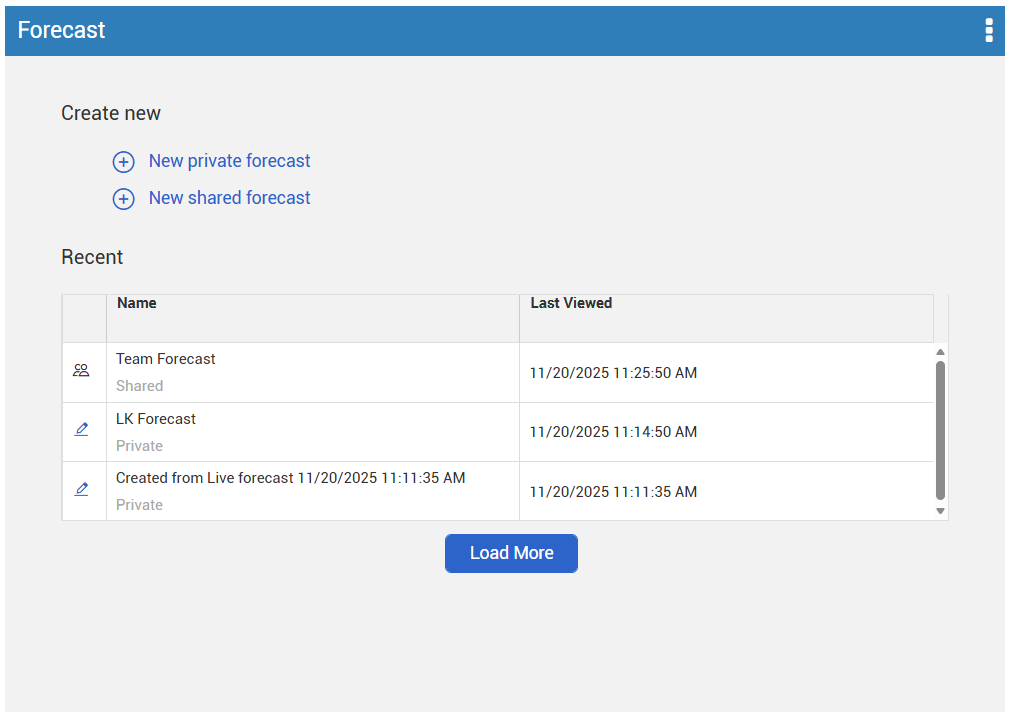
After you make your selection, the data block populates.
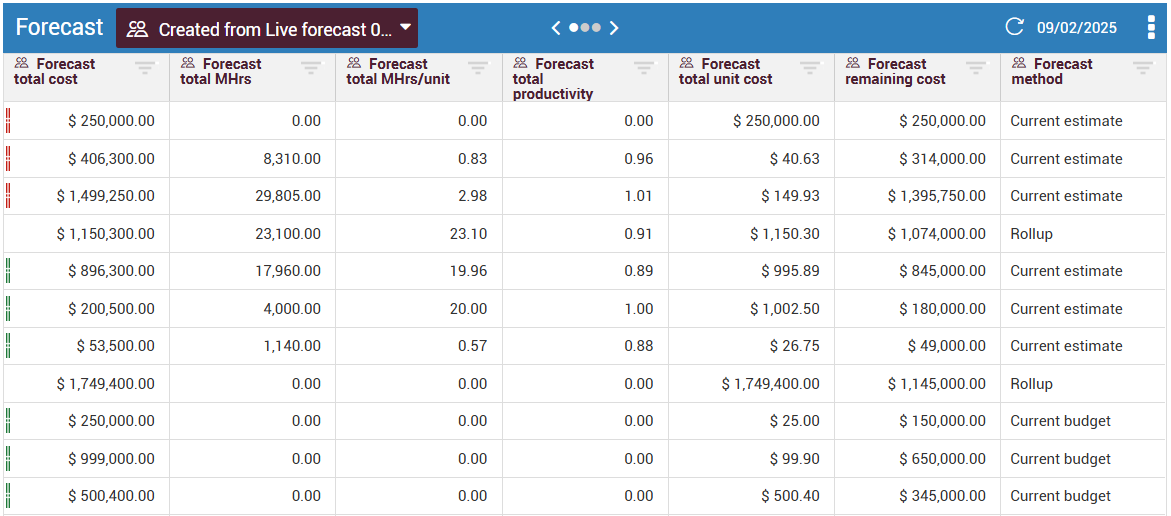
You can adjust the forecast by entering values directly into the data block cells.
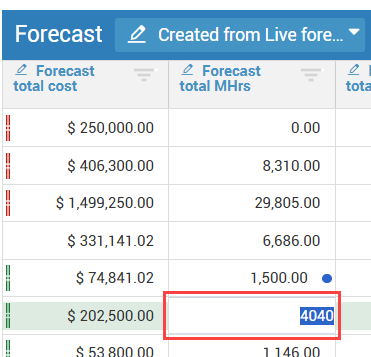
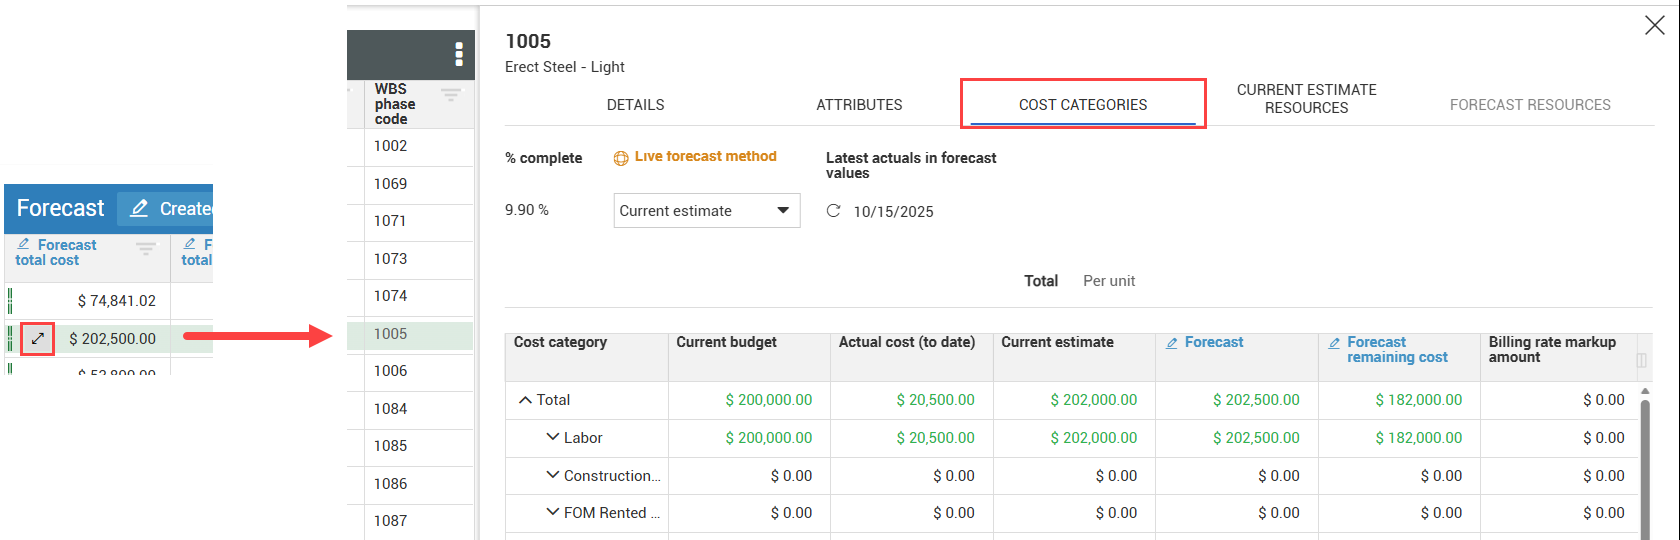
To view or adjust cost categories for a cost item, click the View cost categories icon inside a cell. This opens the Cost Categories tab of the cost item details slide-out panel.
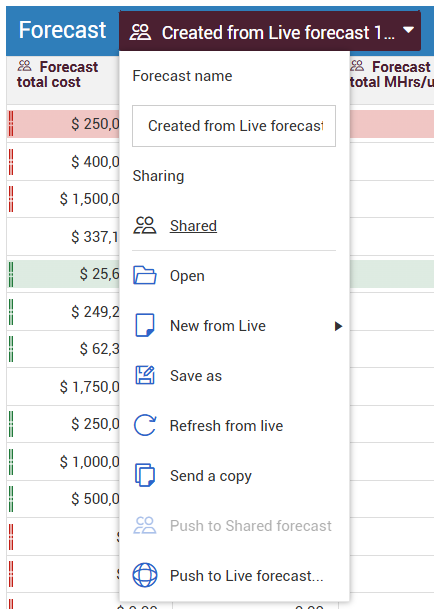
The drop-down menu in the Forecast data block gives you options for managing your forecasts. The image and table below show the option details.
|
Menu Option |
Details |
|---|---|
|
Forecast name |
Enter a name for the current forecast. |
|
Sharing |
Click to select Shared or Private access to this forecast. You can also send a copy of this forecast to team members. |
|
Open |
Load a saved or shared forecast. You can also delete saved forecasts. |
| New from Live | Create a new private or shared forecast from the Live forecast. |
| Save as | Save a copy of this forecast. |
| Refresh from live | Overwrite forecast values with the Live forecast values on selected cost items. |
| Send a copy | Send a snapshot of this forecast to specific users. |
| Push to Shared forecast | Overwrite values in a shared forecast with values from this forecast for selected cost items. See below for more details. |
| Push to Live forecast | Overwrite Live forecast values with values from this forecast for selected cost items. See Push to Live forecast for more details. |
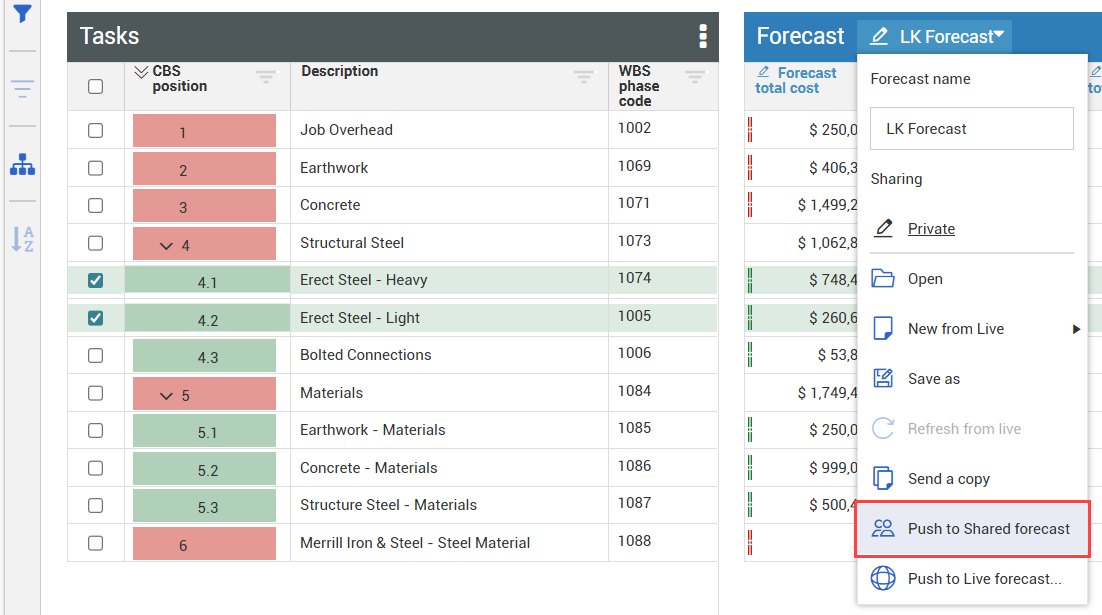
Changes made to a private forecast can be pushed to a shared forecast.
From the private forecast data block, select the cost items with updated values.
Open the data block drop-down menu, and then select Push to Shared forecast.
A dialog box opens where you can review the changes. Select a shared forecast from the drop-down menu.
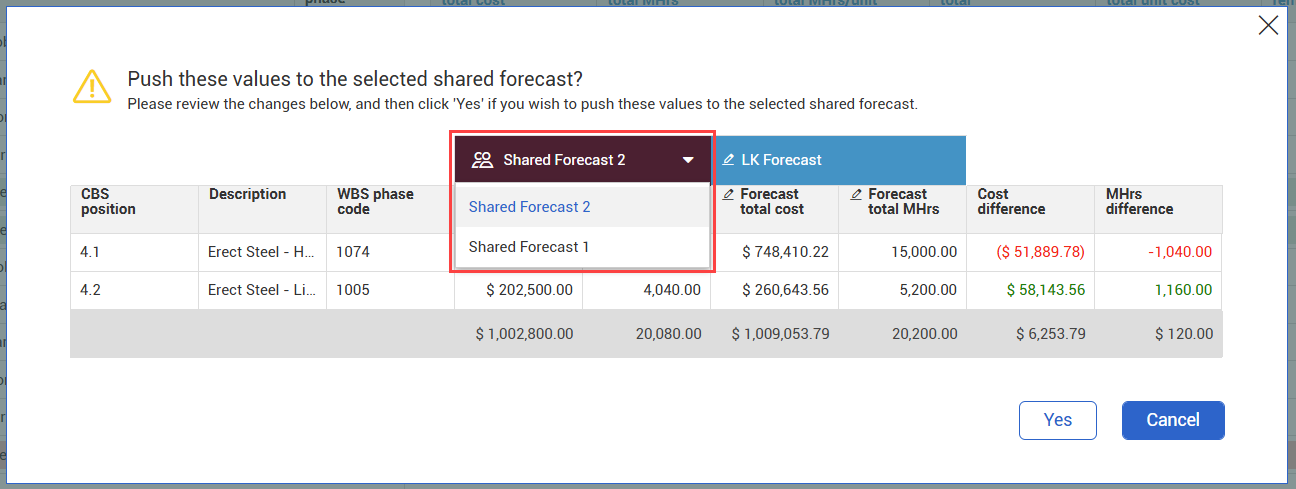
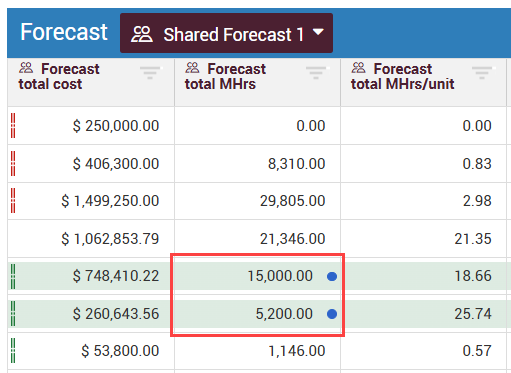
Review the changes, and then click Yes to finish. The updated values now show in the shared forecast.
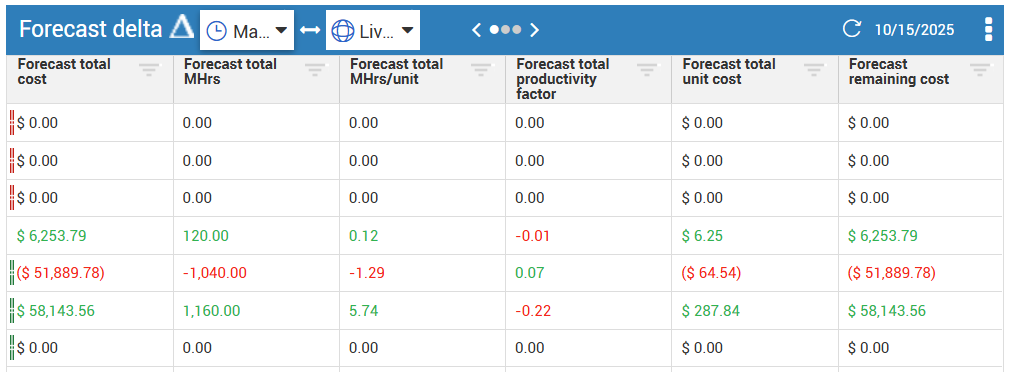
You can compare forecasts by adding the Forecast delta data block to your view and then selecting two forecasts in the data block header to compare.
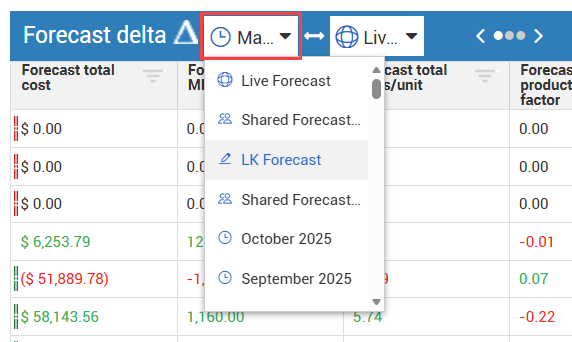
The Forecast delta data block displays any deltas between the selected forecasts.
Values in black indicate equal values between the selected forecasts.
Values in green indicate a higher value than the corresponding value in the other forecast.
Values in red indicate a lower value than the corresponding value in the other forecast.
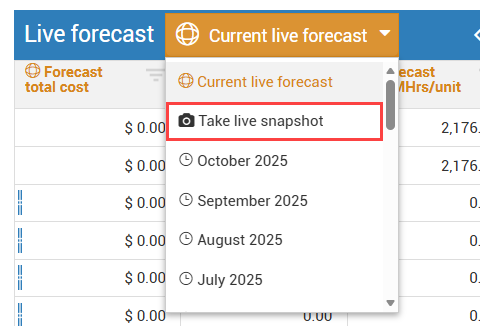
Access the Live forecast data block to view official project forecast values. Users with the correct permissions can make updates directly in the data block.

Additionally, you can access previous Live forecast snapshots from the drop-down menu.
Additional Information
9977 N 90th Street, Suite 250 Scottsdale, AZ 85258 | 1-800-637-7496
© 2024 InEight, Inc. All Rights Reserved | Privacy Statement | Terms of Service | Cookie Policy | Do not sell/share my information